
Friday, 14 June 2019
Scripture wall hanging.
Hello everyone. I have been away from my blog for far too long. I have no excuse and I hope to check in with new projects on a reasonably regular basis from now on. As I return, I thought I would share a little wall hanging I made inspired by Ronda Wade from “Creating for Christ”. I’ve done this in neutral colours to suit most decor. Let me know what you think! It’s good to be back!

Monday, 16 September 2013
Exploding handbag
Well here it is! A tutorial for the exploding handbag.
First cut your A4 piece of card to measure 21cm x28cm. Score at 7cm intervals on both long and short sides. I've also made a score line 1/2cm away from the final score line in the centre section at one end. This is to accommodate the bulk of the card when it is finally folded in.

Remove the two corner pieces as indicated by the blue diagonal lines above. Make sure to remove them from the end where you made that little extra score line in the previous step.

Make a tick mark on either side, 10.5 cm along the side of the base. The flap was NOT included when measuring this.

Exploding handbag part 2
Create more score lines as indicated by the black dashed lines.

Mountain fold all the black dashed lines and valley fold the solid red lines. Remember to punch your decorative edge on the flap!

Add some form of closure. Here I've used a little piece of hook and loop fastener but you could also use magnetic snaps. When pushing them in together try to stagger the long flaps on either side and just take care that they don't get caught on the wrong side of the short centre flaps or it will be practically impossible to close. You'll know something is wrong if it doesn't want to push together reasonably easily.

I hope this makes sense. If you get stuck let me know and I will try to explain more clearly. All that remains is to add a piece of 5mm ribbon as a handle if you wish (I usually put it in the 1/2cm gap at the top) decorate the inside and embellish the outside of your little bag.
Crossover card
Well I've shared nearly all my Makey Bakey mice samples with you but here is another for today. This is a variation on the crossover card, but this time there's an added flap as you can see. The little greeting is attached at one corner and holds the card closed.

I've used my favourite punch again with toppers and paper from the hunkydory pack. I've teamed it with this gorgeous green Centura pearl card.

Hope you like it. I will be back later today with the tutorial I promised for the exploding handbag!
Hanging decoration
Today I'm sharing this hanging decoration I made using my Marianne dies. I started out intending to make a hexagonal box, but I then decided to carry on and make a more elaborate construction. I love this kind of paper project where I make 3d items! It's fun to turn a flat shape into something entirely different. This time I scored 12 die cuts with triangle shapes , each having 6 sets of loops on two sides and 4 on the remaining side. I cut 6 more of the shapes and scored them with a square centre, 4 sets of loops between each score line.

Then began the lying together and for the centre section two sides of the square have the loops turned round to the inside. I added a hanging loop and a homemade tassel during the construction proceess. next I created a template of the centre triangle and used it to make 12 pieces which I embossed in a contrasting colour and attached to the top and bottom for added interest. I used my Tim Holtz rosette die to create 6 rosettes for the sides of the decoration and then cut 12 of the accompanying Marianne die from some of the romantic journey papers to make the flower centres. I finished them off with card candy.t would love to try something like this again but somehow include a light. Will have to have a think!
Sunday, 15 September 2013
Shaker/waterfall card
I've been having a look down my page of posts and discovered I have quite a few I've sent to blogger but never actually got around to posting! This is one of those. Made for the Snowman and Snowdog hunkydory launch I used a shaped card with some of the gorgeous acetate and snowflake sequins for the shaker portion and some of the little toppers to make a waterfall, combined on one card.

In order to keep the toppers the correct way up I've orientated the pull mechanism at the top and added a little bell to add to the festive feel! This was a fun card to make.
Patchwork squares
I love patchwork and have even been known to complete some, quite a few years ago now. I do believe there may even be one or maybe two projects not quite finished. Anyway, I decided to use a patchwork idea in the creation of this card.

I punched tiny squares from one of the hunkydory borders and some gold Mirri card. I also punched some slightly larger scalloped circles from one of the patterned insert papers. The squares are glued into the circles (the circles are pattern side down at this stage) and the edges of the circles creased around the square, so the pattern side now shows. The edges don't get stuck down so it gives the card some texture and added interest. Next I carefully laid all the squares out on a layer of gold Mirri card so I could get them centred as well as possible. The tricky part is gluing them down into place, but I think it's worth the effort! Some more layers of patterned paper and Mirri card with the addition of tiny gold Mirri dots (the little waste dot from my tonic star die, lol) complete my topper. I put the whole thing onto some Centura pearl card and added some of the remaining border and a topper greeting. The card is A5 in size and it just goes to show how little it can take to make a cute card sometimes.
Rocking chair mouse
Well I decided to bring out my spectrum noir pens again and have a little play at colouring and I couldn't go past this cute image of the mouse sitting in her (or his) rocking chair knitting! Can I let you into a secret? I hadn't really intended colouring the poppy type flowers this colour at all, but I plopped the pen on there by accident instead of on the small flowers and decided to just go with it and see how it turned out.

I also decided to try a grey mouse this time instead of brown. It's interesting how different it can make them look. I used a Marianne die to cut a decorative mat from some lilac Centura pearl card and then used a circle die to cut out the centre and treate a frame. I cut the coloured image with the same die so it fits exactly. I punched the corners of the purple card with my new, favourite, tonic, gothic arches punch and put some lilac behind to highlight them. I used the same punch to create the border for the base which acts as the stopper for the easel. The spotty paper is actually lilac too but hasn't photographed too well! It's a piece of a hunkydory insert sheet.
Here are the colours I used.
Mouse-IG1,2&3, flowers-PL3,4&5, small flowers-PP1&2, OR2, CG1, knitting-CT1-4, rocking chair -TN2. I coloured the centre of the large flowers with true black and added some purple stickles. I added some tiny glittery gams to the border and corners to finish it off.
Saturday, 14 September 2013
Who ate all the pies?
Just another quick make with the Makey Bakey mice. Those greedy little mice have been stuffing themselves with mince pies! I can't say I blame them, they certainly look pretty scrumptious. This is an image from the CD teamed with some kraft card and core'dinations. I've embossed the Kraft with the 8x8 embossalicious folder, regency swirls. I then used brushes corduroy distress ink to make the raised detail stand out.

The red panel on the side is embossed with the A4 floral vine folder. I've added some trim Long the edge of the topper for a little embellishment.
A 21st birthday.
I've another card for you today but this time I can take no credit for it. This was made by my very talented daughter as fulfilment of an order for one of her work colleagues.
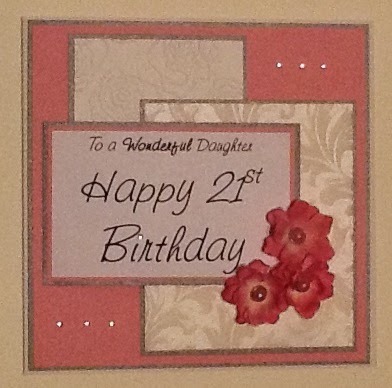
This has been sitting waiting to be shown for quite a while. I'm pretty sure the recipient will have received it long ago so it's safe to share with everyone.
Star decorations
Getting ready for Christmas in our house always involves making some new decorations for the tree and this year my job has been made much easier since tonic introduced their new star die. It's just wonderful. I used it, with some of the card and toppers from the hunkydory pack, to make this little box of decorations.

I created the box and included an acetate section in the lid so I could see at a glance what I had stored in there. They would also make a lovely gift. Has anyone given in to temptation and bought the CDs yet? You won't regret it!
Friday, 13 September 2013
More mice!
I've two different style cards for you this morning. The first one is very simply put together, using toppers from the everyday CD. I've created a dual aspect card and just layered up the image on patterned paper and core'dinations card. I punched two tiny holes, one either side of the stalks of the flowers, and tied a piece of twine through them. The base layer has a piece of core'dinations which I've embossed with the floral vine folder.The only other addition was the little wooden ladybirds.

For the second example I created an easel card but this time I used the hunkydory kit. I cut the layers with spellbinders nestabilities, labels 29. For the base I cut a square of Centura pearl card and embossed it with my Chantilly frame folder. A small flower creates the stopper.

I'm really having fun with these images. Come back soon, there're bound to be more!
Thursday, 12 September 2013
Building sandcastles
Since the launch of these little mice is tomorrow I couldn't resist sharing another card with you today! This time I've used one of the complete card kits from the everyday CD and this card is another biggie, almost A4 in size!

I've used my tonic verso die, gothic arches, to create the mat for the topper and used silver Mirri card behind on the card base. I embossed one end of the base piece and added two little tags, some lace, ribbon and a greeting. I placed this whole layered piece onto some Centura pearl card for extra strength since it is so large. Finally I added some pearls to enhance the detail of the die cut frame.
Exploding box.
Well I've done the exploding bag so I thought I'd better give the exploding box an outing too! This is from the exploding box section of the Christmas Makey Bakey Mice CD, (surprise, surprise), printed onto watercolour card to give strenght and texture. This time I left the outside box sides plain so that the embellishment would stand out and the images wouldn't be compromised.

I added some haberdashery trim I picked up in a sale some time ago and used collall glue gel to attach it. Hot glue would probably have been easier but, of course, I didn't think of it at the time! I added a border punched with a tonic punch to neaten up the edge and added a die cut poinsettia accented with gold stickles.

I've just kept the inside plain and stuck the mat intended for the top onto the inside of the box lid.
Wednesday, 11 September 2013
Little box
Well I've dug the Marianne dies out again as I fancied making a little decorative box! Since there are 16 sets of loops on this die cut it was really easy to score evenly and stick together. I've used the Marianne Romantic journey papers,along with centura pearl card, again.

I used a couple of flowers and the handle is a little"foot" I've had in my stash for a while. This was a quick and easy project!

And there's plenty of room inside for a treat! What more could you ask? :)
O come all ye faithful.
I'm back today to share one of my coloured images for the Makey Bakey Mice collection. I just love this little image of the mouse singing. I decided to make him into a shaped easel card using my spellbinders-labels10-nestabilities, some gold Miri card and one of the hunkydory card bases. The sentiment is stamped from the same stamp set as the mouse and coloured with festive berries distress ink.

I do think I'm getting a little better with my colouring. It always goes through a stage where I think it's awful, but, thankfully, it usually comes out all right at the end! I used my spectrum noir pens to colour. Coat - CR8,9 &11, Fur trim - IG1,2 &3 Mouse body -TN1,3,4 &5, Mouse tummy - TN1, IG1,2 &3, Song sheet EB1 & Holly CR8. I dotted on the colour for the fur trim to give it a more fur like feel.
Subscribe to:
Posts (Atom)